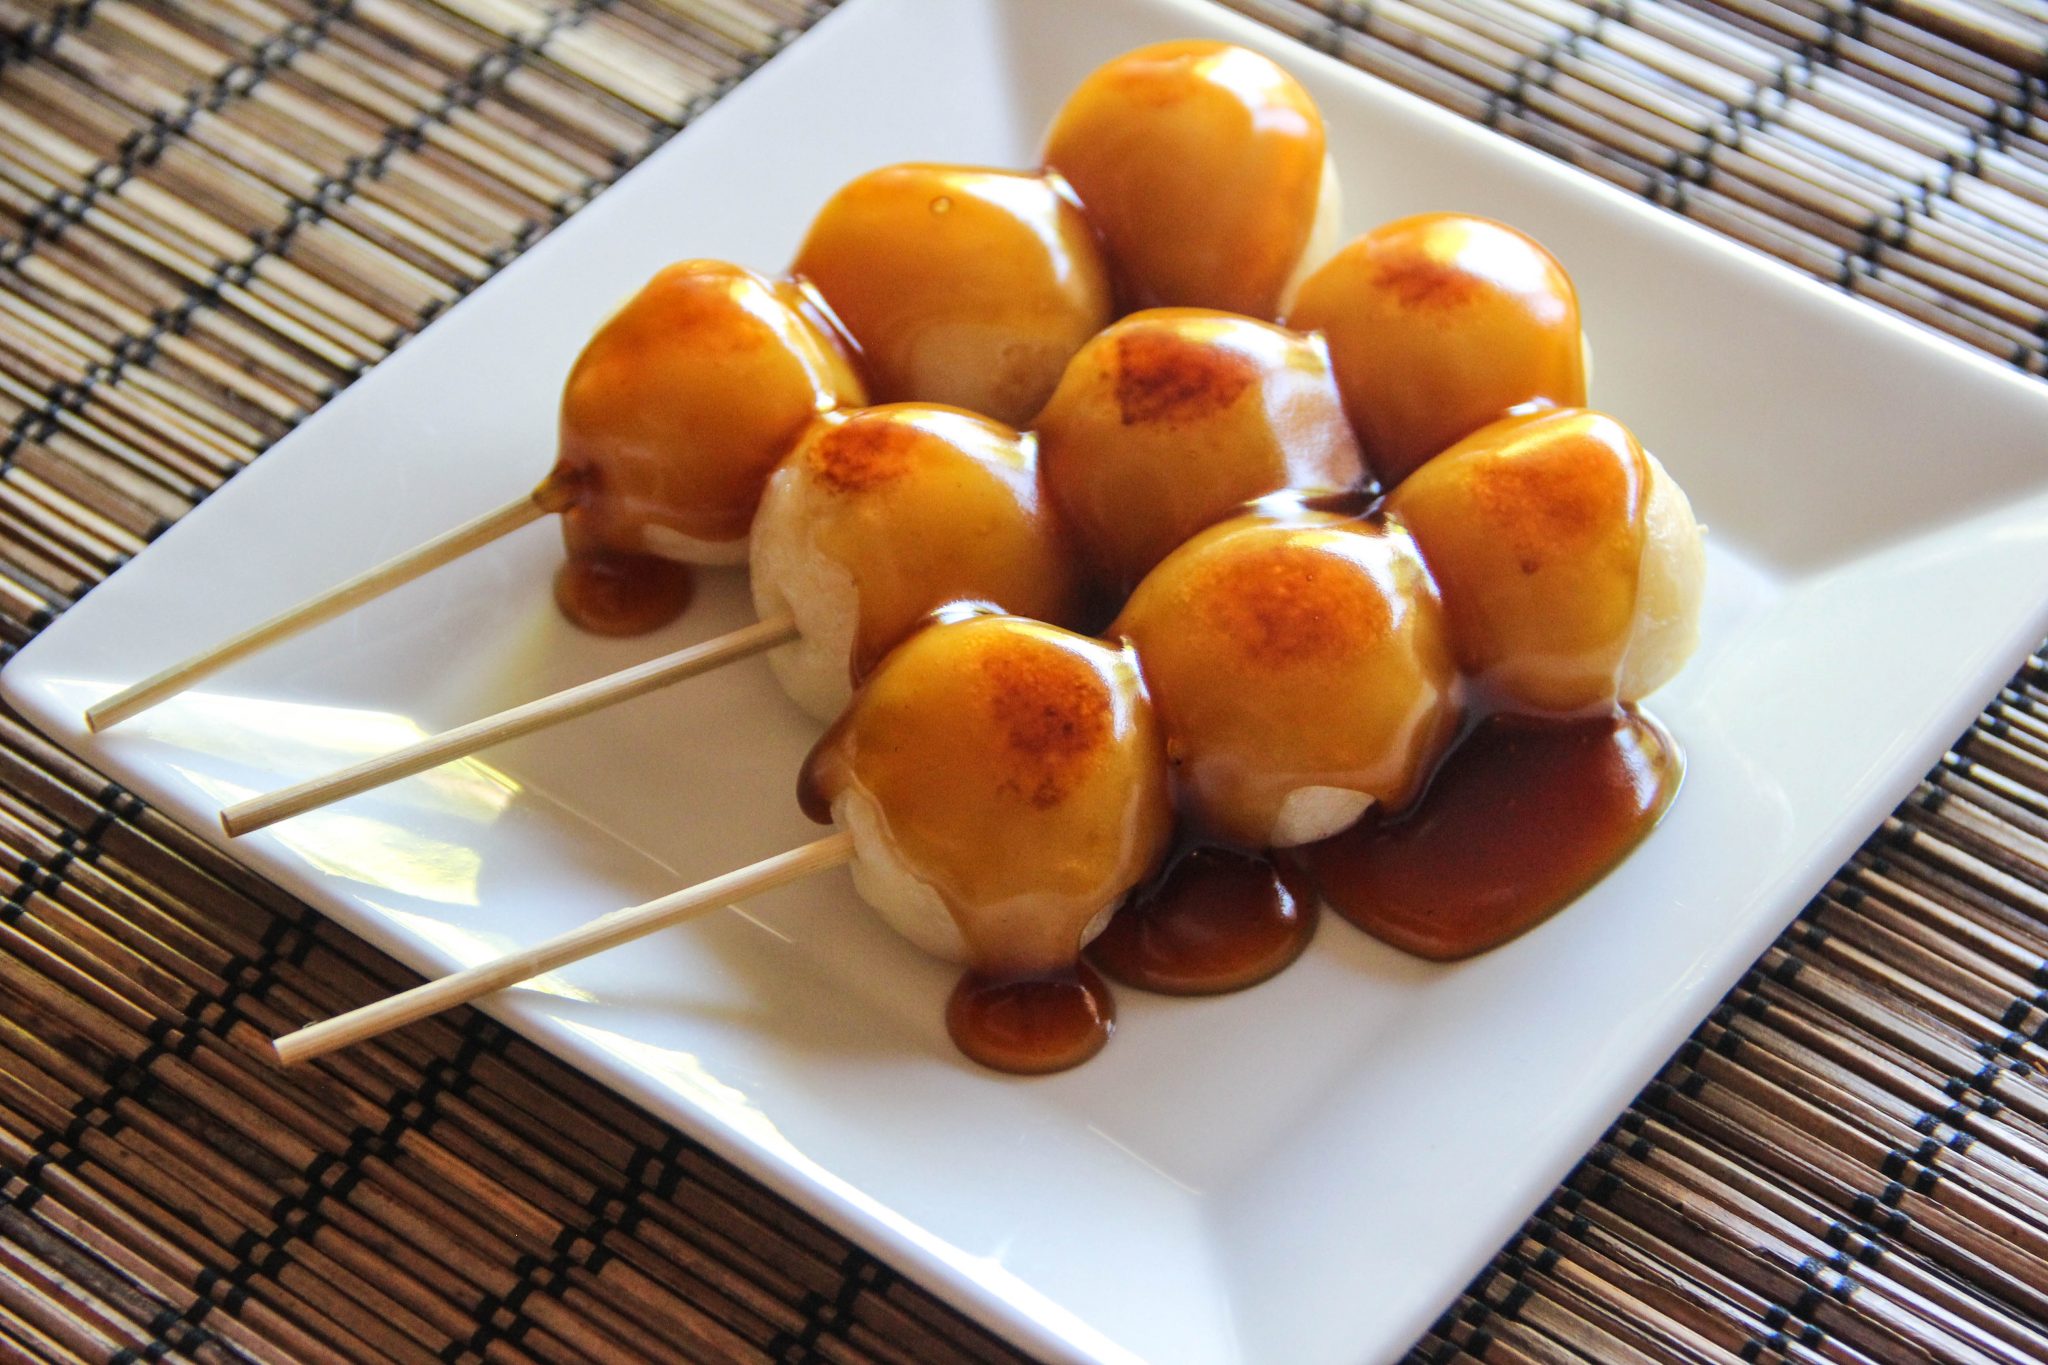
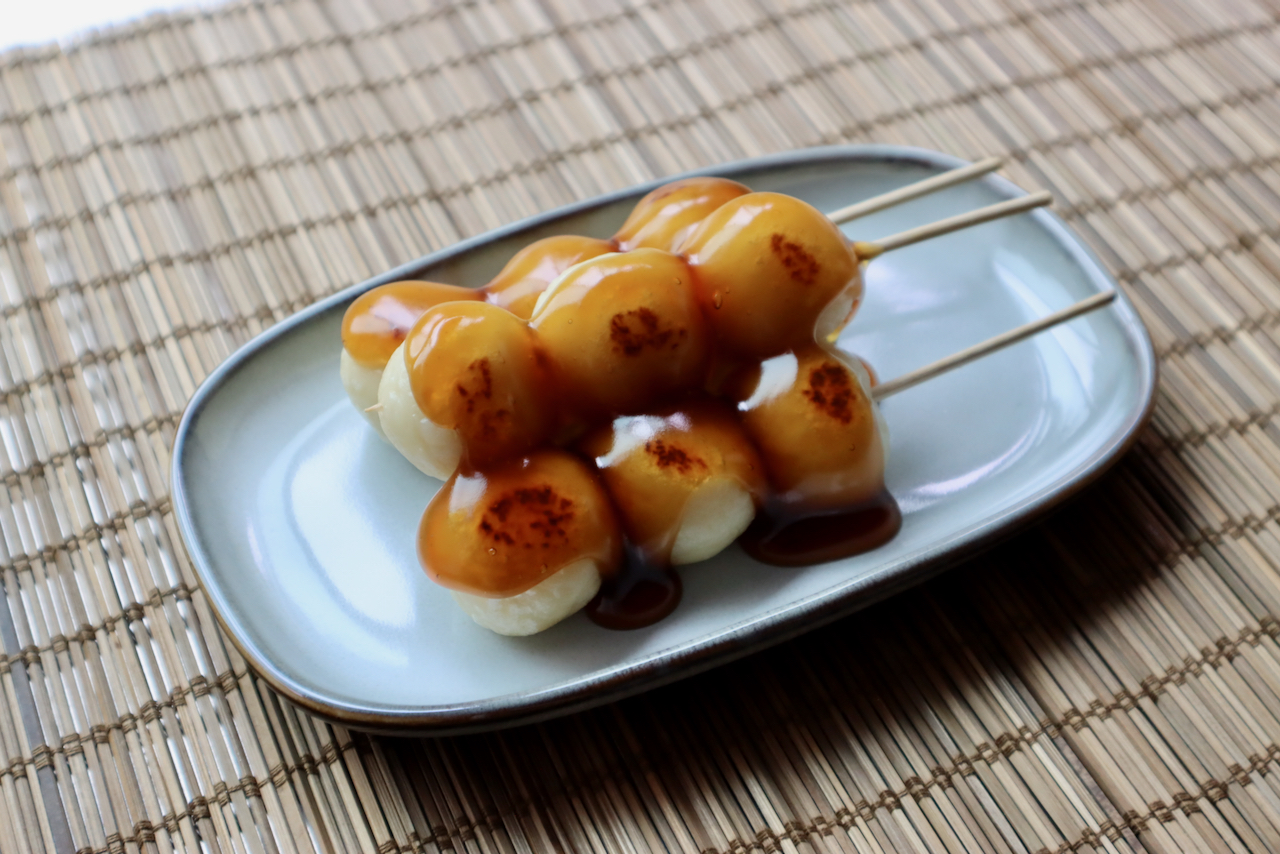
Mitarashi Dango Recipe
Mitarashi Dango (みたらし団子) is one of Japan’s classic traditional mochi sweets. Small, round mochi balls are skewered on bamboo sticks and glazed with a thick and glossy sweet-and-salty brown sauce made from soy sauce and sugar. This simple treat is satisfying without being overly sweet, making it a perfect afternoon snack—especially when paired with a hot cup of green tea.
What’s Mitarashi Dango?
Mitarashi Dango has a long history among traditional Japanese sweets. It is said that the name Mitarashi comes from a festival held at a famous shrine in Kyoto, Japan. Mitarashi Dango was originally made as an offering to the gods at this shrine as far back as the 14th century. Over time, street vendors began selling it around Kyoto’s shrines, and it eventually spread throughout Japan. Today, Mitarashi Dango is a very common treat—you can find it not only at wagashi (traditional Japanese confectionery) shops but also at supermarkets and convenience stores.
Mitarashi Dango is also a popular food in Japanese anime and manga, appearing in well-known series such as Charlotte, Demon Slayer, and many others. And it makes sense—those shiny, gooey, candy-like sauces over cute little mochi balls really stand out on screen. The glossy brown sauce is not only eye-catching but also delicious. Thick and smooth, it has a perfectly balanced sweet-and-salty flavor that coats each mochi ball beautifully, making every bite satisfying from start to finish. Because mochi is naturally dense and chewy, this dessert is surprisingly filling. Mitarashi Dango makes a perfect afternoon snack—just enough to satisfy a craving when you’re a little hungry a few hours before dinner.
Tips on Making Mitarashi Dango
What’s Mochiko and why use it?
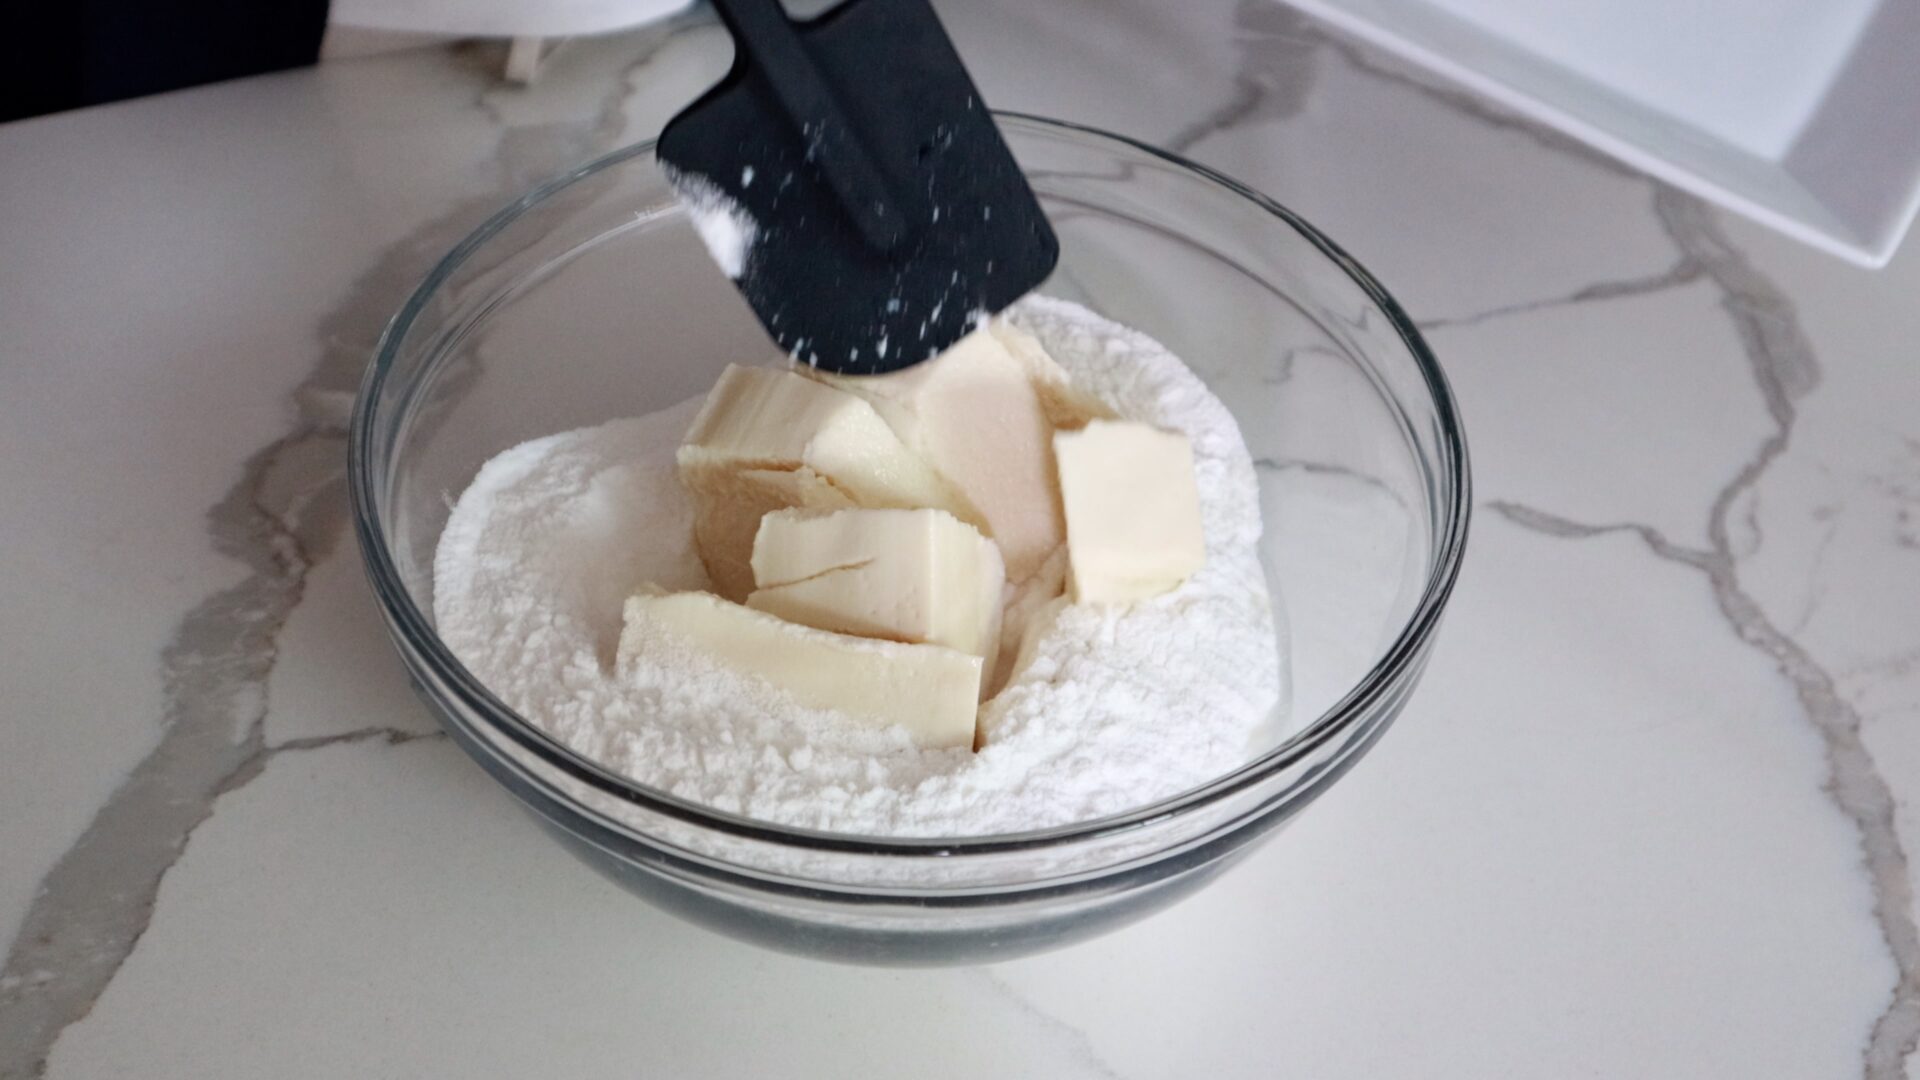
For this recipe, we use Mochiko (glutinous rice flour) instead of other common Japanese flours for Mochi such as Shiratamako, simply because Mochiko is much easier to find in the US. It’s completely different from regular rice flour, which doesn’t become sticky when cooked. In this recipe, Mochiko is mixed with tofu—a little unusual method, but the combination creates the perfect texture and adds moisture without adding any noticeable tofu flavor.
The amount of tofu needed is just a guideline. Depending on the brand and its water content, you may need to adjust the amount. The dough should come together smoothly and feel soft, but it shouldn’t be so sticky that it’s difficult to handle. It needs to hold its shape without sticking too much to your hands.
How to cook Mitarashi Dango?
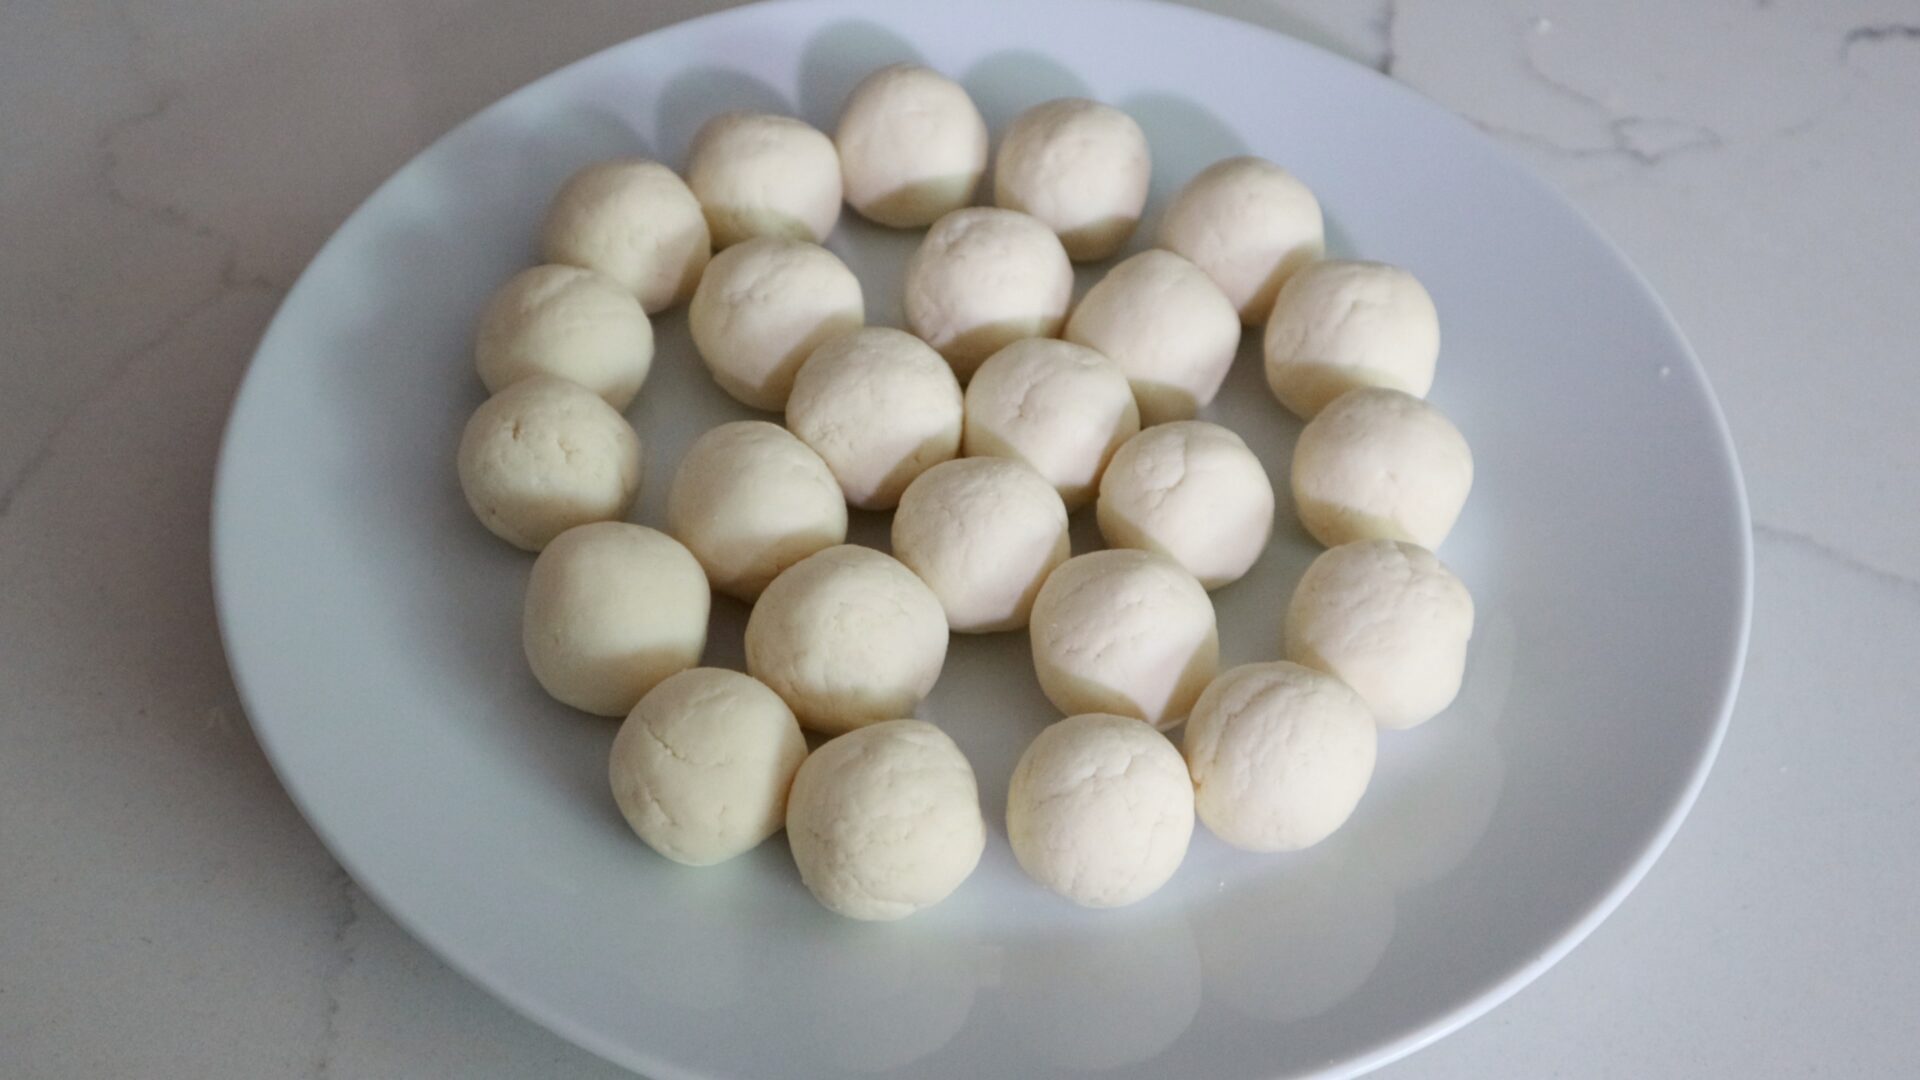
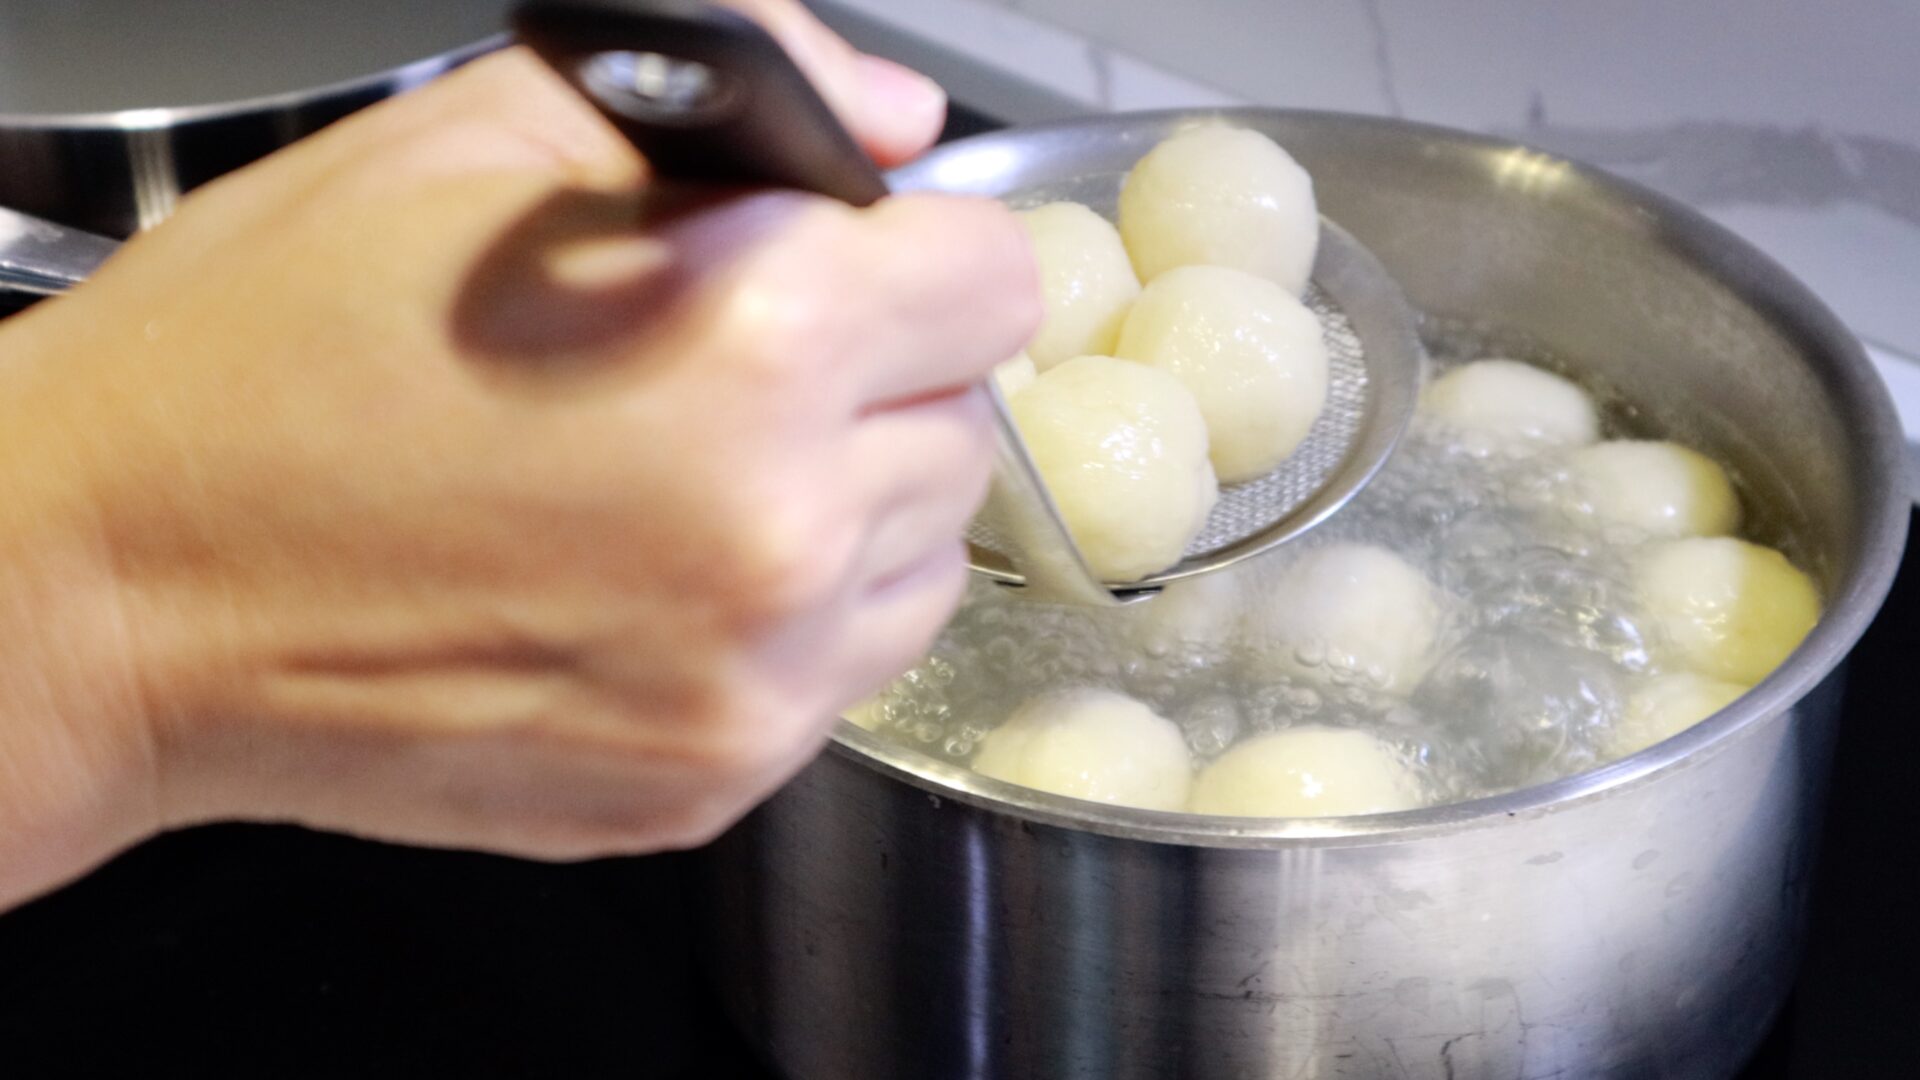
Roll the dango dough into small balls, then cook them in boiling water. Make sure the mochi is fully cooked—undercooked mochi can be doughy in the center. Let the balls float to the surface, then continue boiling them for another 2–3 minutes to ensure they’re cooked through.
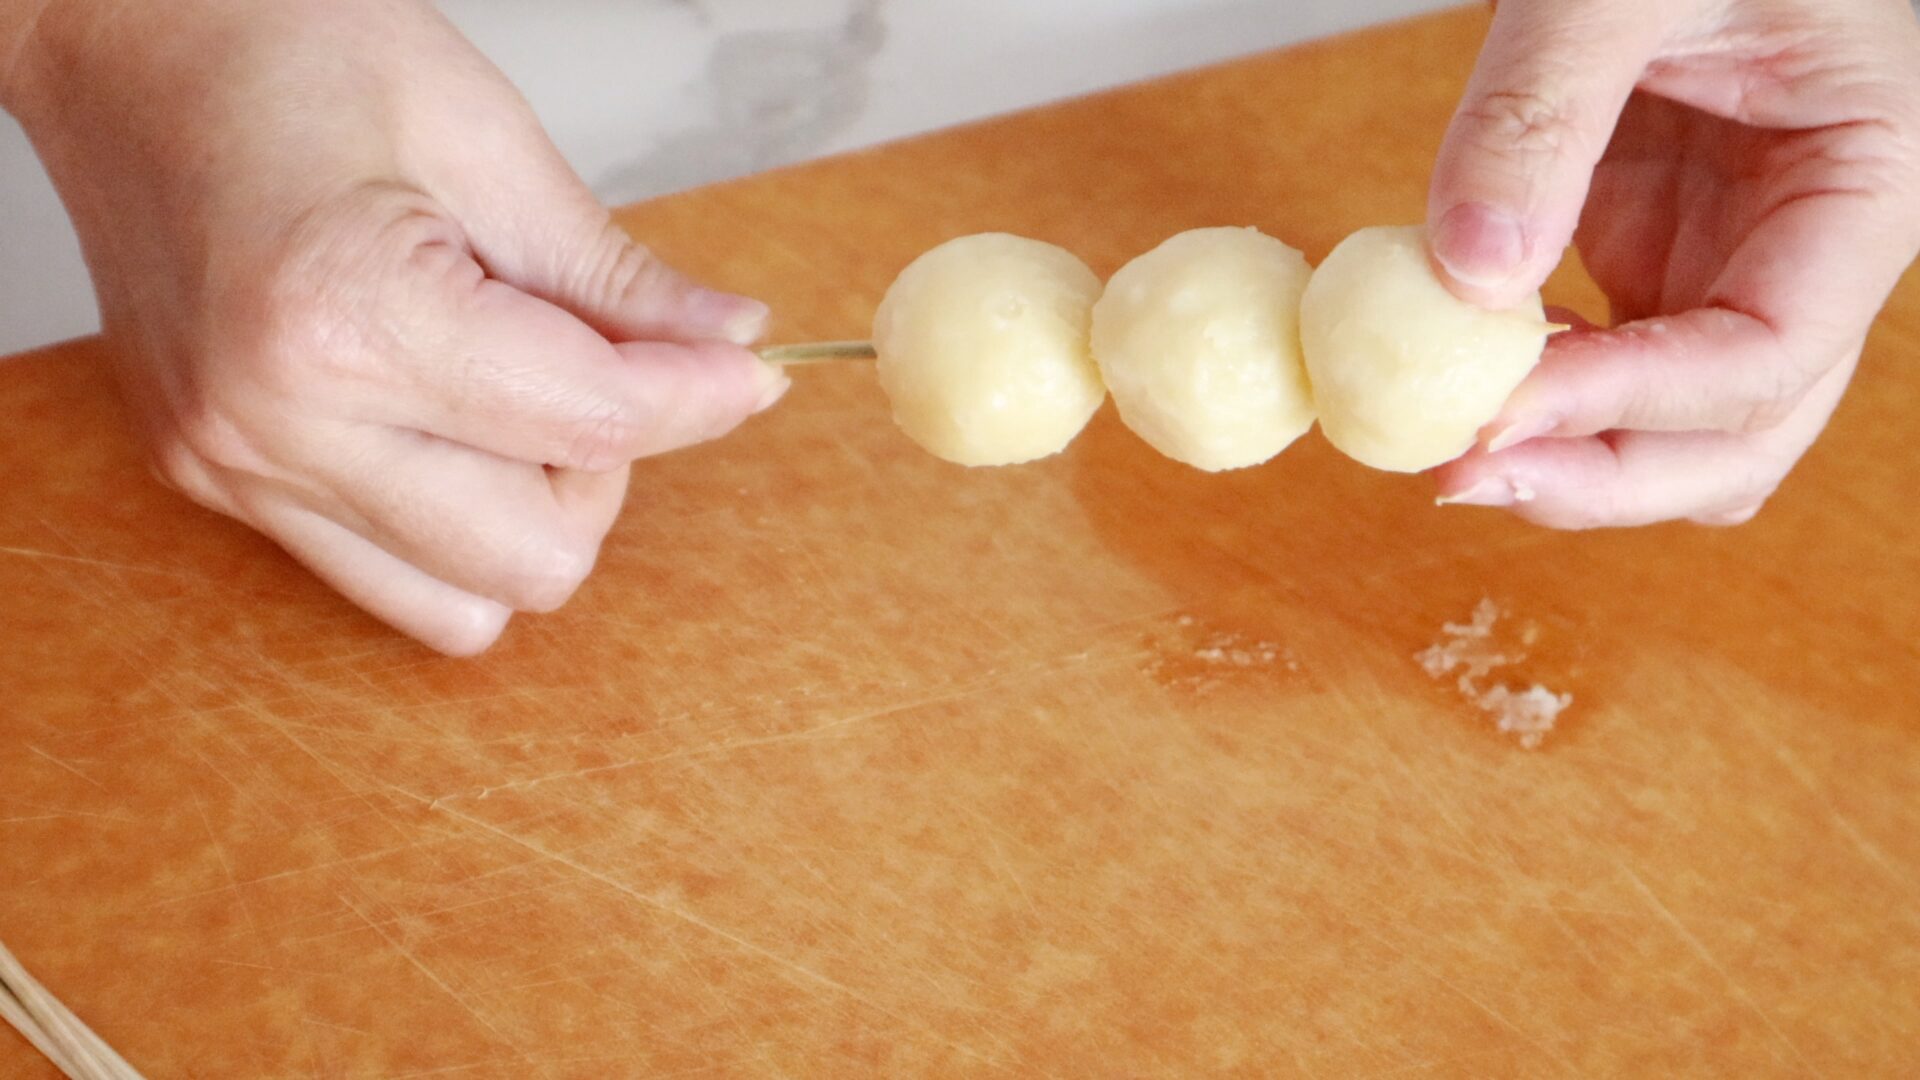
After cooking, skewer the mochi balls and grill them until lightly browned. The browned spots add a wonderful toasty aroma and flavor. Next, coat the dango with a sweet soy-based sauce. The savory fragrance and saltiness of the soy sauce pair surprisingly well with the sweetness of the glaze.

The sauce should be cooked until it turns clear and thickens—be sure to let it boil for a few seconds to reach the right consistency. Mitarashi Dango is best enjoyed fresh—preferably warm, or at least on the same day—because the mochi firms up and the sauce won’t stay as smooth by the next day.
Short Video
More recipes like Mitarashi Dango
This video and article is newly updated from November 2016.
Video
Equipment
- bamboo skewers 6-7 skewers
Ingredients
Mitarashi Sauce
- 2 Tbsp Katakuriko (potato starch) (or corn starch)
- 1/2 cup sugar
- 4 Tbsp Soy Sauce
- 1 cup water (240ml)
Instructions
- In a bowl, mix Tofu and Mochiko well. The dough should not be too loose nor too firm (about the firmness of an earlobe).
- Scoop out tablespoon-size portions of dough and roll into balls.
- Boil water in a large pot, and cook the dough balls until they float. Once they float in the boiling water, cook 2-3 minutes longer, then remove from the water using a mesh strainer (or ladle) and place onto a plate lined with a paper towel.
- Meanwhile, make Mitarashi sauce. In a small pot, add all the ingredients for the sauce and stir. Cook until the sauce boils and keep it warm.
- Slide 3-4 Dango balls onto each skewer. Heat a non-stick frying pan at medium heat, place skewered Dango in the pan, and cook until lightly browned.
- Put Dango on a plate and pour the sauce to coat.
Notes

Instead of lightly pan frying them how do you think they would turn our if I deep fried them until they came out golden brown?
Hello! I just tried the dango recipe and despite having made balls too big (my fault!), the result is very good! Just like the ones I ate in Japan. Thank you lots for the recipe! I will surely make some more to impress my friends 😀
Hi,
how much dangos do you get out of this recipe?
Great recipe! How many servings would this make?
dango should be hard and brittle? I always thought it should be chewy texture, but it came out rather hard. It is very tasty! I love mitarashi dango! <3
hallo..you web are awesome. Im japanese food lover and your web help me a lot to cooking many japanese food in easy way 🙂
I want to ask, is it oke if I keep the raw dough balls in the refrigerator and just take it out when I want to cook it? or cooked it first and put the rest cooked dango in refrigerator? which one is your recommen?
Its 2025, I just made these, they turned out perfectly chewy and savory! I didn’t pan fry after boiling, I actually put them in the fridge and reheated in the air fryer for 7 minutes, they turned out great! Even better the 2nd day.